Changing the background of a photo on Android is now simpler than ever because there are so many apps on the Google Play Store for editing photos. Using those Android photo editing apps, you can quickly remove unwanted backgrounds from your pictures. No matter if you are a designer or not. Mobile photo editing apps are very simple to use.
Unlike Photoshop software, Android photo editing apps don’t require pre-experience to use them. So, keep away your worries and continue reading to learn how to change the background of a picture on Android. Read Also: How To Change Photo Background In Prisma App.
Imagine a photo that you have clicked on your vacation, party, or anywhere else, which might be beautiful, but the background is not. Or sometimes you may think to update a picture on Facebook that illustrates a BMW car, lion, scenery background, or anything else behind you. So, what do you do? Don’t worry, here is a guide to removing the background of a picture easily using your Android phone.
Background Eraser app:
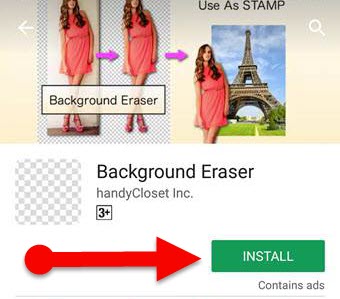
You can find lots of apps to change the background of your photos, but today I have selected the Background eraser app to demonstrate this guide. The Background Eraser app is a handy tool to make your picture transparent by removing the ugly background from your picture precisely.
And the background eraser app provides powerful and various built-in tools for performing a background removal process. Thus, I have selected here to use the background eraser app for making your image transparent.
Replace the Background Image With PhotoLayers – Superimpose app:
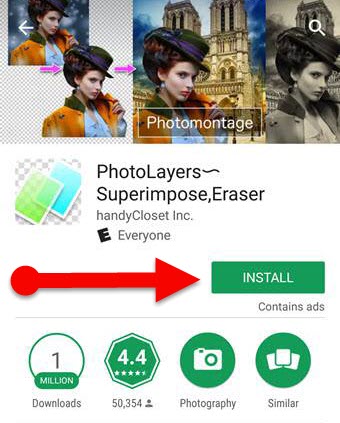
Once you have removed the unwanted regions, you can easily replace the desired background with the help of the “PhotoLayers – Superimpose app.” Using this free superimpose app, you may able be to combine up to 11 pictures together at once in order to create a photomontage. In addition to that, the app also lets you adjust the picture’s color tone (brightness, contrast, saturation, etc.) for making it more beautiful.
Read Also: Best Photo Art Apps For Android
Steps to change the background of a picture on Android
- First of all, install the Background Eraser app from Google Play Store

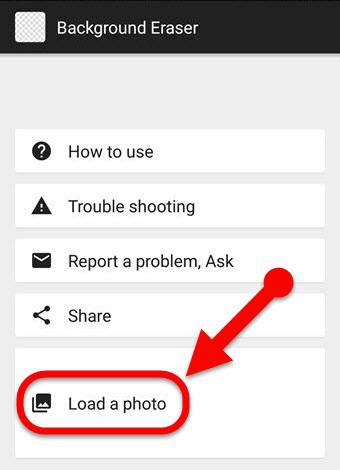
- Once installed in the app, open it from the app drawer.

- Select the “Load a photo” button at the bottom of the app and import a picture from your gallery to remove the background.

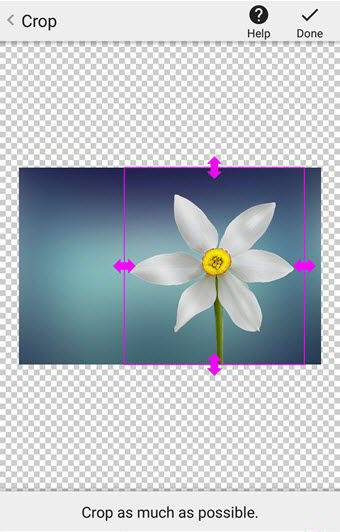
- Now, the Background Eraser app will be prompted with the crop tool, remove the unwanted area of your picture using the crop tool as much as possible, and tap on the “done” button at the top right corner of the app.
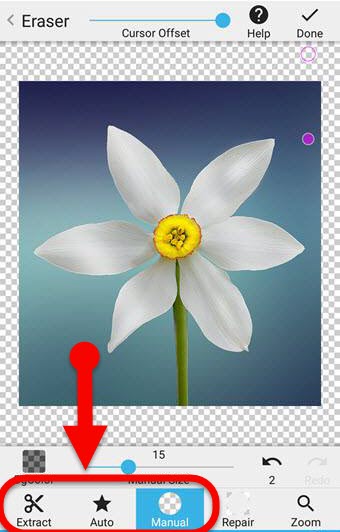
- On the next screen, you will get three options for removing the background — Extract, Auto, and Manual. You can select any of them according to your convenience. But I recommend you to choose the “Extract” tool.

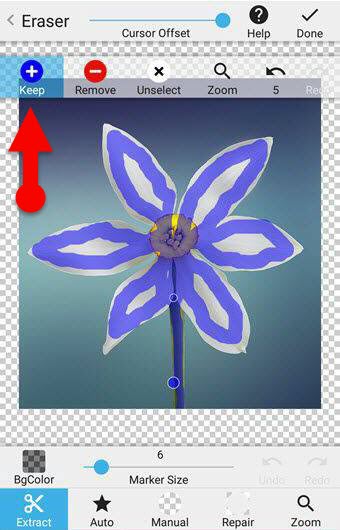
- Once you selected the “Extract” button, the app will show a toolbar at the top of the screen. Select the “keep” tool from the toolbar and mark the corners of the objects you want to keep on your image.
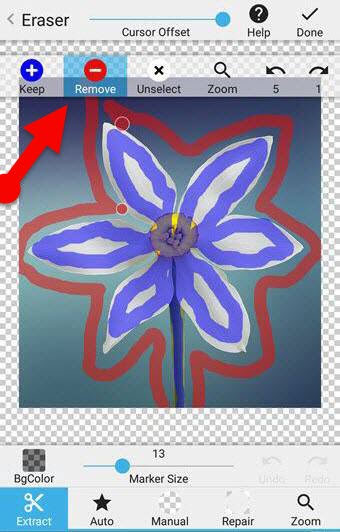
- Likewise, choose the removal tool and mark the edges of the picture you want to remove from the image. (Background Eraser app will automatically detect similar pixels and remove them from your picture)
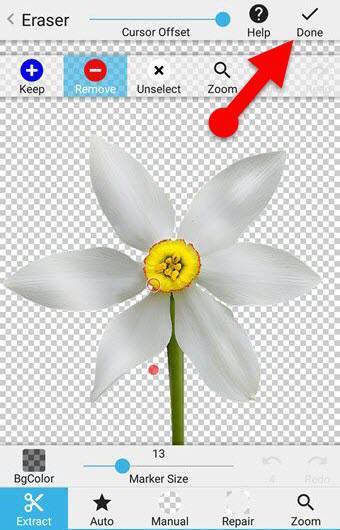
- After you have deleted the photo background, tap on the “done” button at the top right corner of the app. If there is any blunder in the removal of the background, then you can use its Repair mode to revert the changes.
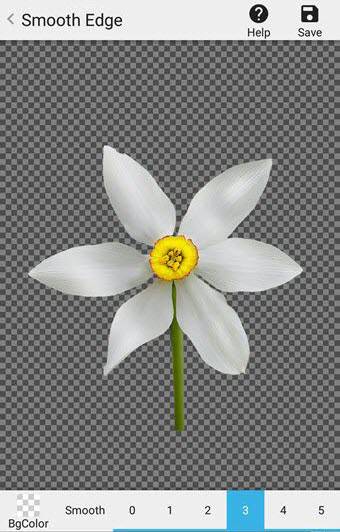
- Once you do that, select the exact smooth edge value on the next screen to apply smoother curves for your resulting image, and save it to your gallery as a PNG image by tapping on the “Finish” button.

- Now, you have successfully removed unneeded objects from your image. And now you want to add a background for your transparent image. To do so download and install the PhotoLayers – Superimpose app from Google Play Store.

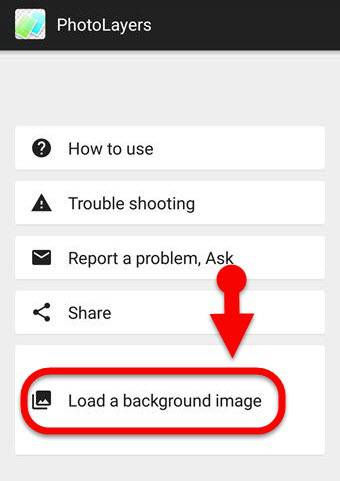
- Open the PhotoLayers app on your Android phone and select the “Load a background image” button. (You can find free background images on pixabay.com or Google Image Search.)

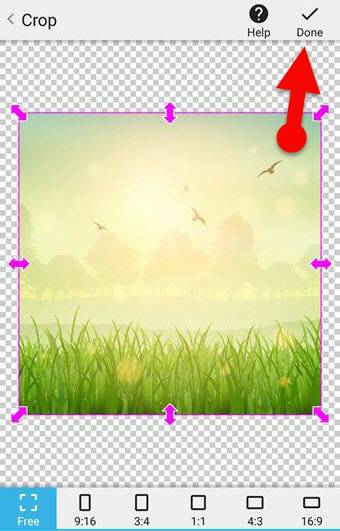
- Import the desired background image from your image, crop it if needed, and tap on the “done” button.

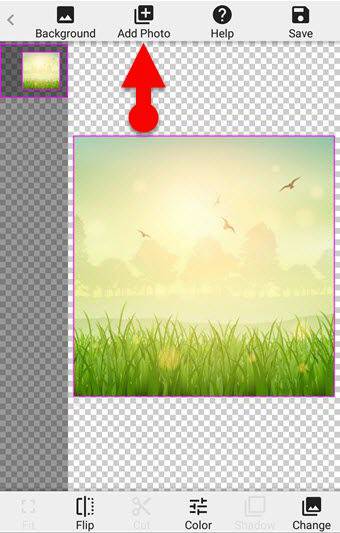
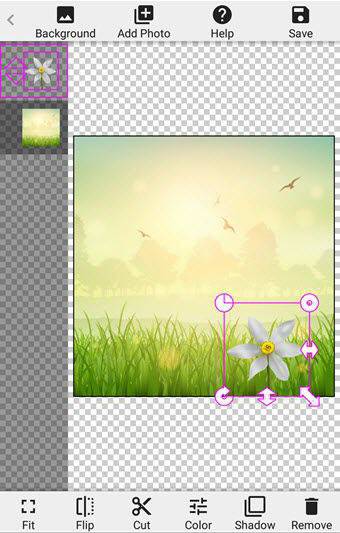
- Now tap on the “Add photo” button at the top of the app and import the transparent image from the gallery you created earlier.
- Now, the PhotoLayers app will ask you to crop the picture, Ignore it and tap on the “done” button to go to the next step.
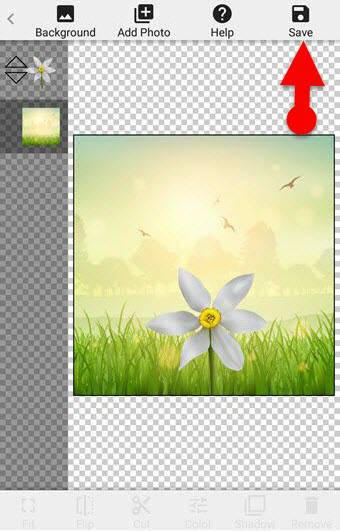
- On the next screen, you can adjust the size, color, and rotation angle of the image and then click the save button.
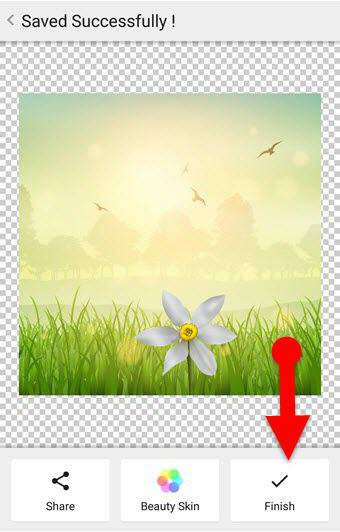
- Finally, tap on the “Finish” button to save your image to the Gallery.
That’s it. Similarly, you can add up to 11 pictures for the background to make a photomontage.
See also: Best Android Apps to Make a Cartoon of Yourself
Verdict:
So this is a complete guide to learning how to change the background of a picture on Android using the Background Eraser app. After reading this tutorial, you would be able to make an image transparent, add a background for a transparent image, or change the background of an image on Android.
I hope this article will be useful for those who wish to remove unwanted background from their photo and replace a beautiful background instead of it. Also, I love to hear your thoughts about this guide so don’t forget to leave a comment if you found it useful.